Picture this: you've just opened your shiny new set of clippers, ready to give yourself or a friend the haircut of a lifetime. You’re holding the clippers in one hand, a mirror in the other, and suddenly it dawns on you: what the heck are all these colorful plastic guards for? Do you just pick one at random and hope for the best? Absolutely not!
Welcome to the magical world of clipper guards, the unsung heroes of hair cutting. Imagine trying to paint a masterpiece with a toothbrush. Sure, you can get the job done, but it won’t be the easiest or prettiest process. The same goes for haircuts without the right clipper guards.
So, how do you go about choosing the right clipper guards without turning your hair into a chaotic mess? Grab your coffee, relax, and let us guide you through this hairy adventure. Spoiler: it’s going to be fun, and maybe a little hairy (pun intended).
Understanding Clipper Guard Numbers
Clipper guards, also known as attachment combs, come in a variety of numbers, each representing the length of hair they leave behind. It’s kind of like the barber’s version of a choose-your-own-adventure book, but with less reading and more cutting. The numbers usually range from 1 to 8, but can go higher depending on the brand.
Here’s a fun fact: the number on the guard translates to the length of hair left behind in inches or millimeters. For example, a #1 guard typically leaves 1/8 inch (3mm) of hair, while a #4 guard leaves 1/2 inch (13mm). Choosing the right guard length is essential to achieving the hairstyle you desire. You wouldn’t want to leave the barbershop (or bathroom) looking like Jim Carrey in Dumb and Dumber by using a guard that’s too short!
Do the Numbers Actually Matter?
You bet they do! If you’re aiming for that trendy fade or classic buzz cut, getting the numbers right is crucial. Each clipper guard serves a specific purpose, and picking the wrong one could leave you wondering what went wrong. It’s like trying to bake a cake without following the recipe – sure, you’ll end up with something edible, but it might not win any awards.
For that sleek fade, you might use guard numbers in a sequence, say starting with a larger number like #4 at the top and gradually working down to a #1 near the nape. The result? A smooth transition that screams “professional.” On the other hand, if you just want a uniform cut, sticking to one guard length will do the trick.
How Close is Too Close?
This is a valid concern. No one wants to end up with a cut that’s too close for comfort (literally). If it's your first time experimenting with clipper guards, it’s always a good idea to start with a longer one. You can always go shorter, but unfortunately, there’s no rewind button once too much hair is gone.
Consider this a pro tip: when in doubt, go higher. Unlike bad movie sequels, a higher guard number won’t leave you disappointed. Plus, hair grows back. It's like a magical renewable resource, just waiting for you to get it right next time.
Colors and Materials – Do They Matter?
Brace yourself for a touch of nostalgia. Remember those colorful LEGO bricks you played with as a kid? Clipper guards can be just as vibrant! Some brands use colors to differentiate between sizes, making them easier to identify. So instead of squinting at tiny numbers, you can just grab the bright orange guard and know it’s the one you need.
While colors are fun, don’t forget about the material of the guards. Most clipper guards are made from plastic, but you can find metal ones too. Plastic guards are lightweight and easy to attach, while metal guards are more durable. Choosing the best material depends on your
use and preference. If you’re a once-in-a-blue-moon DIY barber, plastic guards should be just fine. However, if you’re a professional or an aspiring hairstylist, investing in metal guards might be a better long-term decision.
Now let's get into the nitty-gritty of clipper guard selection. Buckle up, because it's about to get very educational – and a bit funny, too! We’re here to keep things light-hearted while packing in all the info you need to avoid hair disasters.
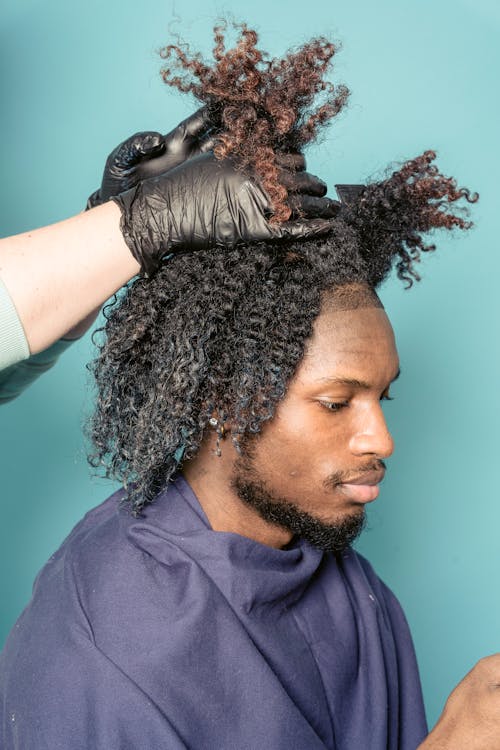
Know Your Hair Type
First things first, not all hair types react the same way to clipper guards. Have you ever tried to use a comb on curly hair and ended up looking like you fought a lion? The same principle applies here. If you have thick, coarse hair, longer guards might be necessary to achieve the desired look without the hair pushing back. Similarly, finer hair may require shorter guards to get a uniform cut.
Imagine mowing a lawn. If the grass is thick and you’re trying to use a weak, low-powered mower, you’ll end up with uneven patches. Now replace "grass" with "hair" and "mower" with "clippers," and you’ll get the idea. To achieve that #HairstyleGoal, you need the right guard that matches your hair type.
The Magic of Blending Guards
If you’re aiming for a more sophisticated, blended look, you’ll need to use multiple guards. Imagine you’re an artist, and each guard is a different brushstroke creating the ultimate masterpiece. Start with the longer guard, usually at the top of your head. As you go down, switch to shorter guards to create a smooth transition, also known as tapering.
This layered effect adds depth, making your hair look fuller and less like a mushroom cap. (Nobody wants to look like a mushroom cap, unless you’re getting ready for a costume party!) If you're new to hair cutting, practice makes perfect. Don’t be disheartened if your first attempt looks more Picasso than Michelangelo.
Different Strokes for Different Folks – Guard Types
You might be surprised to learn that clipper guards come in more styles than just length. Taper guards, for example, are designed for creating precise fades. They’re fantastic for that clean look, making you look like you just stepped out of a high-end barber shop, even if you did it at home in your pajamas.
There are also specialty guards designed for specific styles and hair textures. For instance, if you’re working on a beard, shorter guards are your best friends. Longer guards are more suited for hair on the head. You might not want to mix the two unless you’re going for a very unique look!
Pro Tips from the Cut Masters
Every amateur clippersmith has asked themselves, "What would a pro do?" Luckily, we've got some top-notch tips from the experts themselves. First, always keep your clipper blades oiled. Think of it like flossing for your clippers. It ensures smooth operation, increasing their lifespan and providing cleaner cuts.
Secondly, clean your guards after each use. Remember the last time you washed your car and felt like you drove it out of a dealership? A clean guard works better and reduces the chances of annoying hair snags. Plus, hygiene is key – nobody wants leftover hair bits from last week’s project!
Lastly, practice scanning your head with the guard before making contact. It’s a great way to see how the guard sits against your scalp and helps you visualize the result. This practice scan can be a game-changer and turn you from a nervous novice into a confident hair artisan.
Don’t Forget the Accessories
Sure, clipper guards are awesome, but doing a great job also requires a few nifty accessories. A good quality comb can help you guide the hair and ensure even cutting. Hair clips can section off areas, making it easier to manage and cut precisely. It’s like having a set of wizard tools in your barber arsenal.
Another secret weapon? A handheld mirror. It might seem old school, but it lets you see the back of your head. Unless you're planning to blind-cut by feel alone (not recommended), a mirror can be incredibly handy for getting a complete view. Trust us, your future self will thank you.
Clippers and Guards: Best Buddies
Understanding that your clippers and guards are besties helps in appreciating their chemistry. Not all guards fit all clippers. Ensure that your set is compatible. Ever tried fitting a square peg in a round hole? It’s just as frustrating trying to attach a non-compatible guard to your clippers.
Some high-end clipper brands offer universal guards that fit different models, providing more versatility. Others come with proprietary designs that offer a snug fit and better performance. Knowing which one you have will save you from the dreaded “why won’t this thing fit?!” moment.
Wrapping it Up
Choosing the right clipper guards boils down to understanding your hair type, knowing the look you’re aiming for, and using the right tools for the job. It’s a blend of science, art, and a touch of humor. Remember, hair cutting should be fun, not a chore!
So the next time you're staring at your colorful array of clipper guards, take a deep breath and remember that you've got this. Whether you aim for a sophisticated fade, a simple buzz cut or experimenting with new styles, the right guard will help you get there. Now go forth and conquer the hair world, and don’t forget to capture those Instagram-worthy before-and-after shots! You might just become the next viral hair guru.
Still feeling a bit unsure? Shoot us a message or swing by our website, BarberSets.com, for even more tips, tutorials, and top-of-the-line barber supplies. Happy clipping!
Learn how to create a personalized makeup kit that guarantees professional-quality results with our latest blog post! Whether you're a makeup artist or simply a beauty enthusiast, we provide step-by-step instructions and tips on selecting the right products for your needs. Achieve outstanding outcomes and enhance your skills by building a custom makeup kit tailored to your preferences and desired effects. Discover the essentials and expertise you need to take your makeup game to the next level.
This blog provides essential tips for organizing salon equipment and makeup products to enhance workflow in a salon setting. By implementing effective organizational techniques, such as creating designated storage areas, categorizing products, and utilizing clear labeling systems, salon professionals can easily locate and access the equipment and products they need, ultimately improving efficiency and customer satisfaction.
Learn how to create a signature barber look that will impress your clients every time with our helpful tips and techniques. Be sure to check out our blog for more detailed information.


Leave a comment