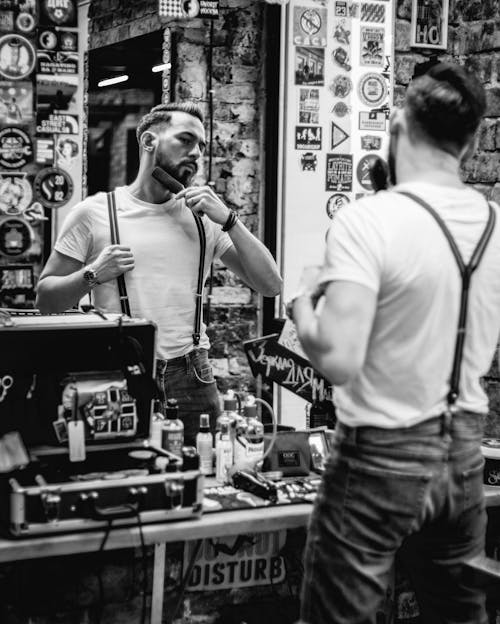
Welcome, dear readers, to the world of hair grooming! Whether you're a professional barber, an enthusiastic DIY hairstylist, or just someone who appreciates looking suavely sophisticated, you've come to the right place. Today, we are going to delve into the art of crafting the classic side part hairstyle—a timeless look that emanates elegance and refinement. Let's get those clippers, combs, and pomades ready as we take a journey through the labyrinth of perfectly parted hair.
First things first—let’s talk tools. You wouldn't attempt to paint the Mona Lisa with finger paint, and similarly, achieving the classic side part requires the right equipment:
-
Clippers: Versatile clippers like the Wahl Professional 5-Star are essential for trimming sides and back uniformly.
-
Combs: A fine-tooth comb will help you achieve that sharp side part line, while also distributing product evenly.
-
Shears: Quality shears are crucial. Look for something like the Juntetsu Offset Shear for precision cutting.
-
Hairdryer: This tool helps in setting the desired shape and volume. A lightweight model with multiple heat settings will do wonders.
-
Pomade or Gel: To achieve that slick, finished look, pomades like Layrite offer a firm hold without appearing overly greasy.
-
Spray Bottle: Sometimes, a little spritz of water is all you need to bring stubborn hair under control.
Now that your tool arsenal is locked and loaded, let's dive into the actual styling process:
Step 1: Preparation
You're about to build a masterpiece, and every artist knows preparation is key. Start by washing your hair. Yes, you heard it right! Clean hair is easier to manage and style. Plus, who wants to mold grease into elegance? No one.
While washing, use a good quality shampoo and conditioner to soften the hair. Ever tried molding clay that's too hard? Same principle applies. Wet hair is malleable, and conditioner makes hair easier to comb and part.
Step 2: Choosing Your Part
People have different face shapes and hair growth patterns, so choosing the side to part your hair is more than just flipping a coin. Most people have a natural part, a side where the hair tends to split naturally. Go with the flow—literally.
If you're unsure, try both sides and see which one looks more flattering. Pro tip: Stand in front of a mirror, grab your comb, and part your hair in the middle. Whichever side your hair seems to favor usually makes for a more natural-looking part.
Step 3: Cutting
Here comes the tricky part—getting the cut right. Imagine sculpting a statue out of marble; one wrong chisel, and you’re starting over. For a classic side part, you want a structured yet smooth cut.
-
Tapered Sides: Ask your barber to create a gradual fade. Starting from the bottom, go shorter as you move up, keeping it longer towards the top. A quality clipper with adjustable settings will help to offer a sharp, clean taper.
-
Top Length: Don't go too short on top—about 2 to 4 inches will give you enough length to style without looking too poofy. Shears are your best friend here, as they allow for more control.
-
Blend: Use blending shears to seamlessly connect the varying lengths of hair. This step ensures there are no harsh lines, giving it a polished look.
Step 4: Drying and Setting
Now, grab your hairdryer. Position it to blow air from the base of the roots to add volume but avoid the highest heat setting to prevent hair damage. Use your fingers to direct the hair, followed by a fine-tooth comb to perfect the placement.
While drying, lift and tousle the hair slightly opposite to where it naturally falls. This action offers extra volume and some resistance when you eventually place it into your part. Think of it as putting guardrails on a slippery slope.
Step 5: The Art of the Part
Ah, the pièce de résistance—the actual part
Step 5: The Art of the Part
Ah, the pièce de résistance—the actual part itself. Once your hair is dry, you need to create that crisp, defining line that makes the side part stand out. Here’s how to add some Michelangelo finesse to your hair artistry:
First, take your trusty fine-tooth comb and identify where you want the part to be. Start from just about the outer edge of one of your eyebrows and part your hair neatly. Firmly pull the comb through your hair, ensuring the line is straight and clear. This is your Picasso moment, take your time, no rush here.
If your hair resists or insists on reverting to its unruly ways, give it a gentle spritz from the spray bottle. Then, firmly yet gracefully, comb the hair on either side of the part to ensure it stays disciplined and knows its place. Like a maestro orchestrating a symphony, every hair strand should understand its role in the grand performance.
Step 6: Pomade Application
Now comes the important bit where the magic potion steps in—pomade or gel. Here's a pro tip from the barber world: warm the pomade between your palms before applying. This simple trick ensures even distribution and makes the product easier to work with.
Start at the back of your head (yes, start from behind like you're plotting a stealthy mission), and work your way forward, making sure to cover every strand. Apply more product sparingly if needed. Focus on distributing the pomade evenly, and run your fingers through your hair to apply the product down to the roots. This ensures a firm hold and a sleek finish.
Once the hair is coated in pomade, use your fine-tooth comb again and gently redefine the part. Comb the sides down and the top over, creating that sharp, classic look. Finally, smooth everything down for a polished finish, like laying fresh asphalt on a highway.
Step 7: Locking it Down
The secret to any long-lasting style is to ensure it stays in place—enter the hairspray. Hairspray not only reinforces the hold but also gives a touch of added shine, like a glossy magazine cover.
Hold the hairspray at arm's length and lightly mist your hair. You’re not trying to lacquer a dining table, so keep it light and breezy! You'll want some flexibility and natural movement, so moderation is key. Pass a comb over the surface once more to ensure everything is lying flat and unified, much like a chef adding the final garnish to their dish.
Step 8: Maintaining the Masterpiece
Congratulations! Your classic side part is now a work of art. But like any masterpiece, it requires upkeep:
-
Regular Trims: Pop by your barber for regular trims to keep the sides tidy and the top looking fresh. Neglect is the number one enemy of hair styling!
-
Daily Touch-Ups: A bit of daily maintenance goes a long way. A quick comb and a dab of pomade can resurrect your side part even on groggy Monday mornings.
-
Product Care: Avoid product buildup by washing your hair with a quality shampoo every few days. Conditioner is your friend—it keeps your locks soft and manageable.
Q&A: Common Side Part FAQs
Let’s break out the crystal ball and address common queries:
Q: Can I create a side part with curly hair?
A: Absolutely! While it may take a bit more effort, a side part looks fabulous with curly hair. Use a diffuser when blow-drying, and opt for a medium-hold gel to define curls while setting the part in place.
Q: My hair is thin. Can I still rock a side part?
A: Of course! Thin hair doesn’t mean you can’t have a stylish side part. Use volumizing products and blow-dry your hair to add texture and fullness. This will give the illusion of thicker hair.
Why a Classic Side Part Never Goes Out of Style
The classic side part has graced the heads of many icons, from old Hollywood stars like Cary Grant to modern-day marvels like David Beckham. The elegance it emanates transcends time, making it always in vogue. Here’s why a classic side part stands the test of time:
-
Versatility: The side part can be dressed up for formal occasions or styled casually for everyday wear. It’s the Swiss Army knife of hairstyles.
-
Timelessness: A well-executed side part never looks out of place. From the boardroom to a night out, it is universally accepted.
-
Effortlessly Cool: With minimal effort, you can look polished. It’s like having an auto-tune button but for your hair.
In Conclusion: Side Part Success
There you have it, folks! You’ve got the breakdown of how to achieve the classic side part hairstyle. Equipped with the right tools and techniques, you're well on your way to becoming a hair maestro. Whether you’re wooing your next date, sealing a business deal, or just embracing your stylish side, the classic side part is a surefire way to look prim, proper, and perpetually polished.
And remember, every great work of art requires patience, practice, and a bit of passion. Your hair is no different. So go on, give it a go, and may your side part be ever in your favor.
Now, let’s see those elegant hair flips and confident strides. You’ve earned them!
Got more tips and tricks? Share your secrets in the comments below. Until next time, stay sharp and stay stylish.


Leave a comment